
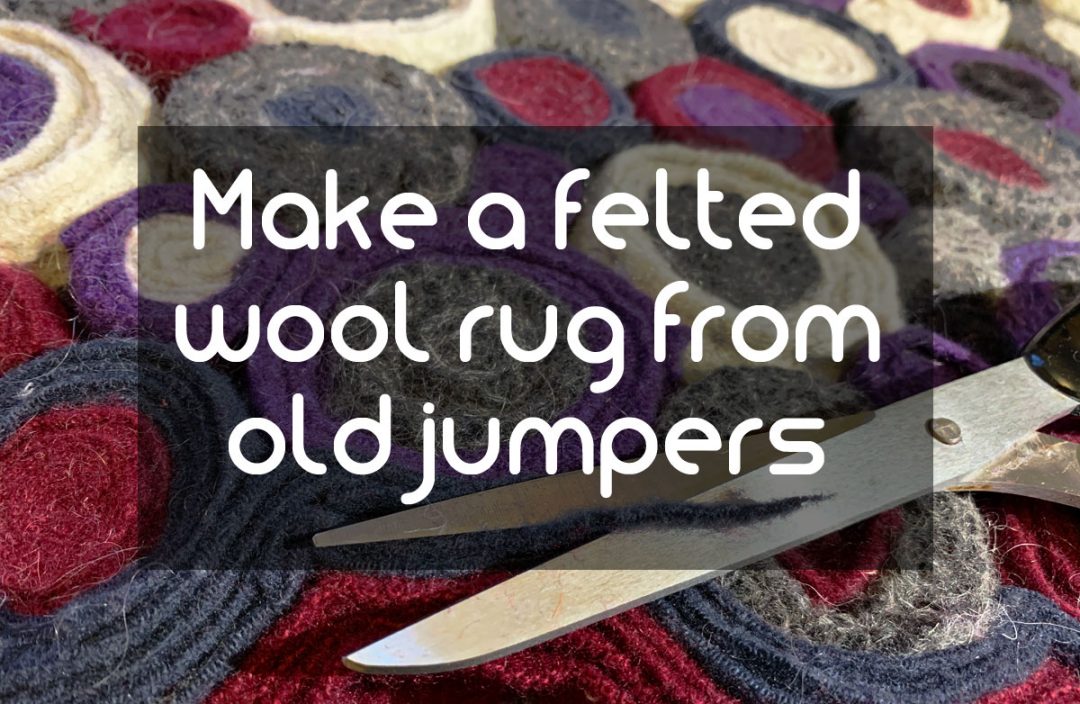

How to make a soft and warm felted wool rug
Did you know that you can buy old wool jumpers for crafting from Oxfam? I didn’t until I read this brilliant tutorial from Shirley, who is a less-stuff, less-waste Patreon. I’ll let her introduce herself!
“I’m Shirley.
I’m a Christian, a Labour Councillor, and for most of my life have worked in Local Authorities, the NHS, and I’m a volunteer for Oxfam. I’m married to Kev, who is also a Labour Councillor in the next Ward to mine, and we have 4 children – 2 I gave birth to, and 2 that are our foster daughters. I like baking, sewing and painting (pictures, not walls), although I have done a couple of murals.”
How to make a felt rug
Step 1. Get your OH to do the clothes washing.
Step 2. Don’t learn from step 1, and let him do it several times, washing your woollen and cashmere cardigans and jumpers.
Step 3. Buy new jumpers and cardigans, and vow to never let him near the washing machine ever again!
Step 4. Tell your friend, accept her also shrunken woollens.
Step 5. Store them under a bed for a while until inspiration strikes/you’ve calmed down, whichever happens first!
Then, go on that time-sucking site Pinterest, and decide to make a felted wool rug out of the ruins! Or, go on Oxfam online, and order 5 damaged donated cashmere jumpers/cardigans for £25 – they’ll even let you pick the colours you’d like! (You can’t do that right now, as they’ve closed that part of the site due to Covid-19). If they’re not shrunk, wash them on a hot wash, then tumble dry them on hot, trust me, it really works, my OH proved it!
Anyway … 1. Start off with your felted woollens
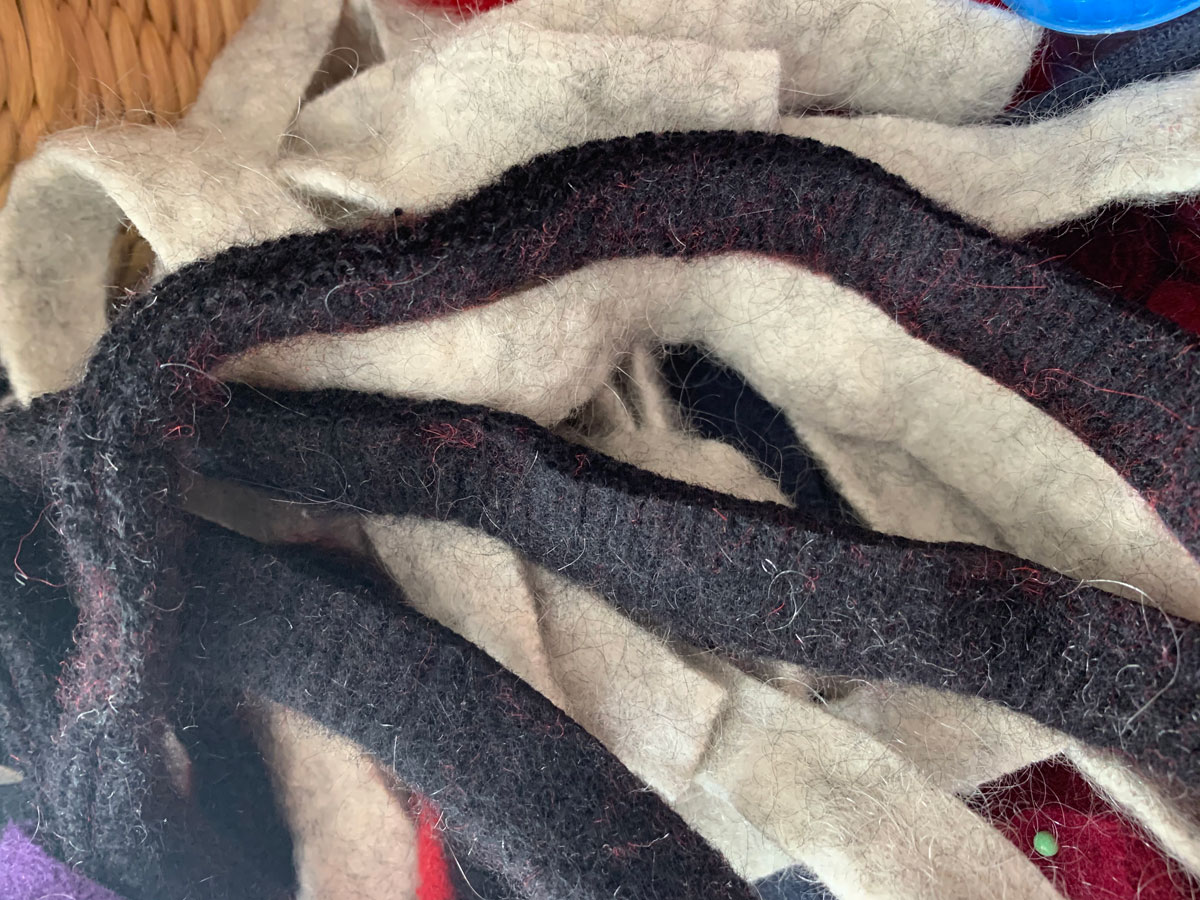
cut them into ½” wide strips.
I used 5 items – one grey cardigan for the base of the rug, after cutting the sleeves off and lying it flat, and a purple jumper, a burgundy, a light grey and a navy cardi. It helps if you’re accurate in cutting the strips out. I used scissors, next time I’d use a rotating cutter on a cutting mat with a rule. I wasn’t as accurate as I thought!
2. Start to roll your strips
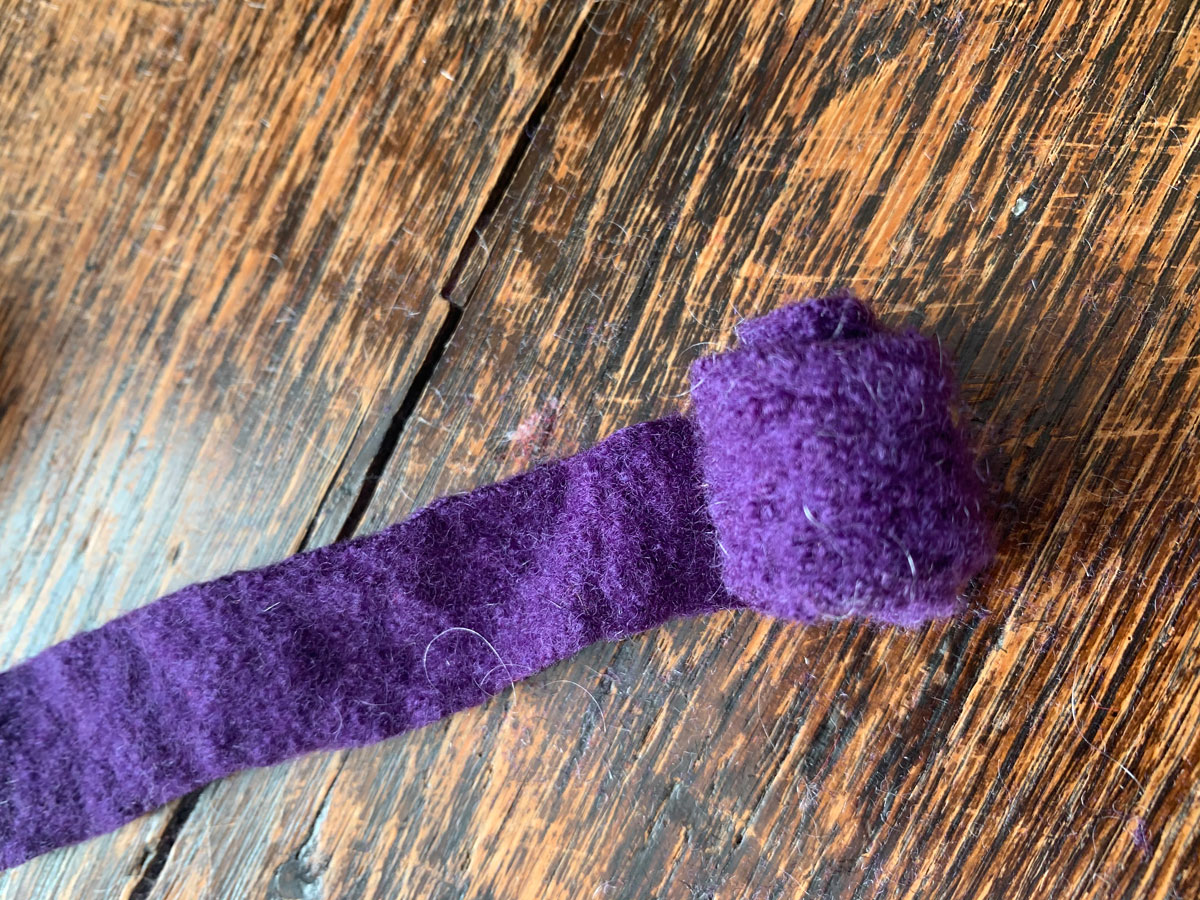
I decided to roll single colours, then wrap them in a second colour. I tried rolling 2 colours together, but didn’t like that as much.
 This is my very old sewing table you can see underneath! It’s an old oak drop leaf table.
I decided how big I wanted each spiral to be – I knew I’d need some smaller and some bigger ones, so there weren’t any gaps in the finished rug.
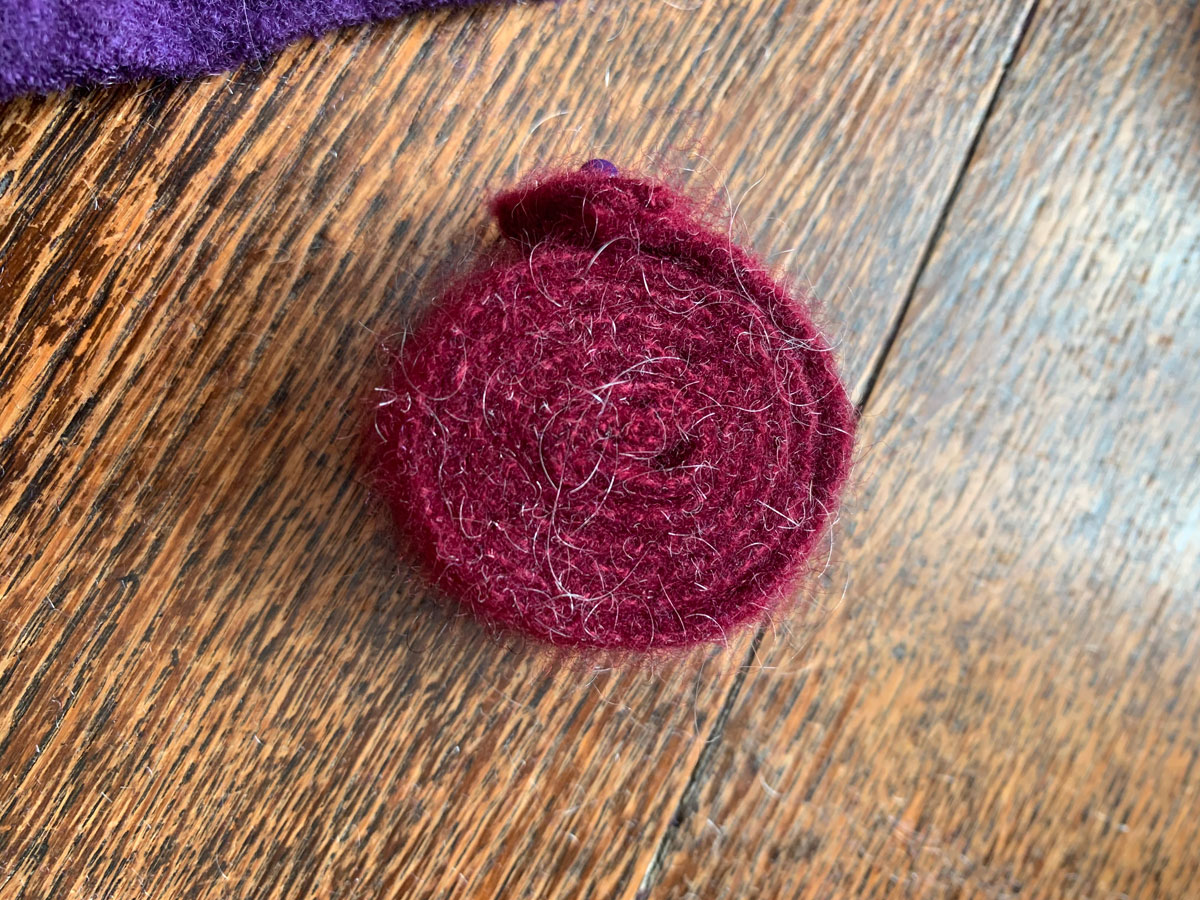
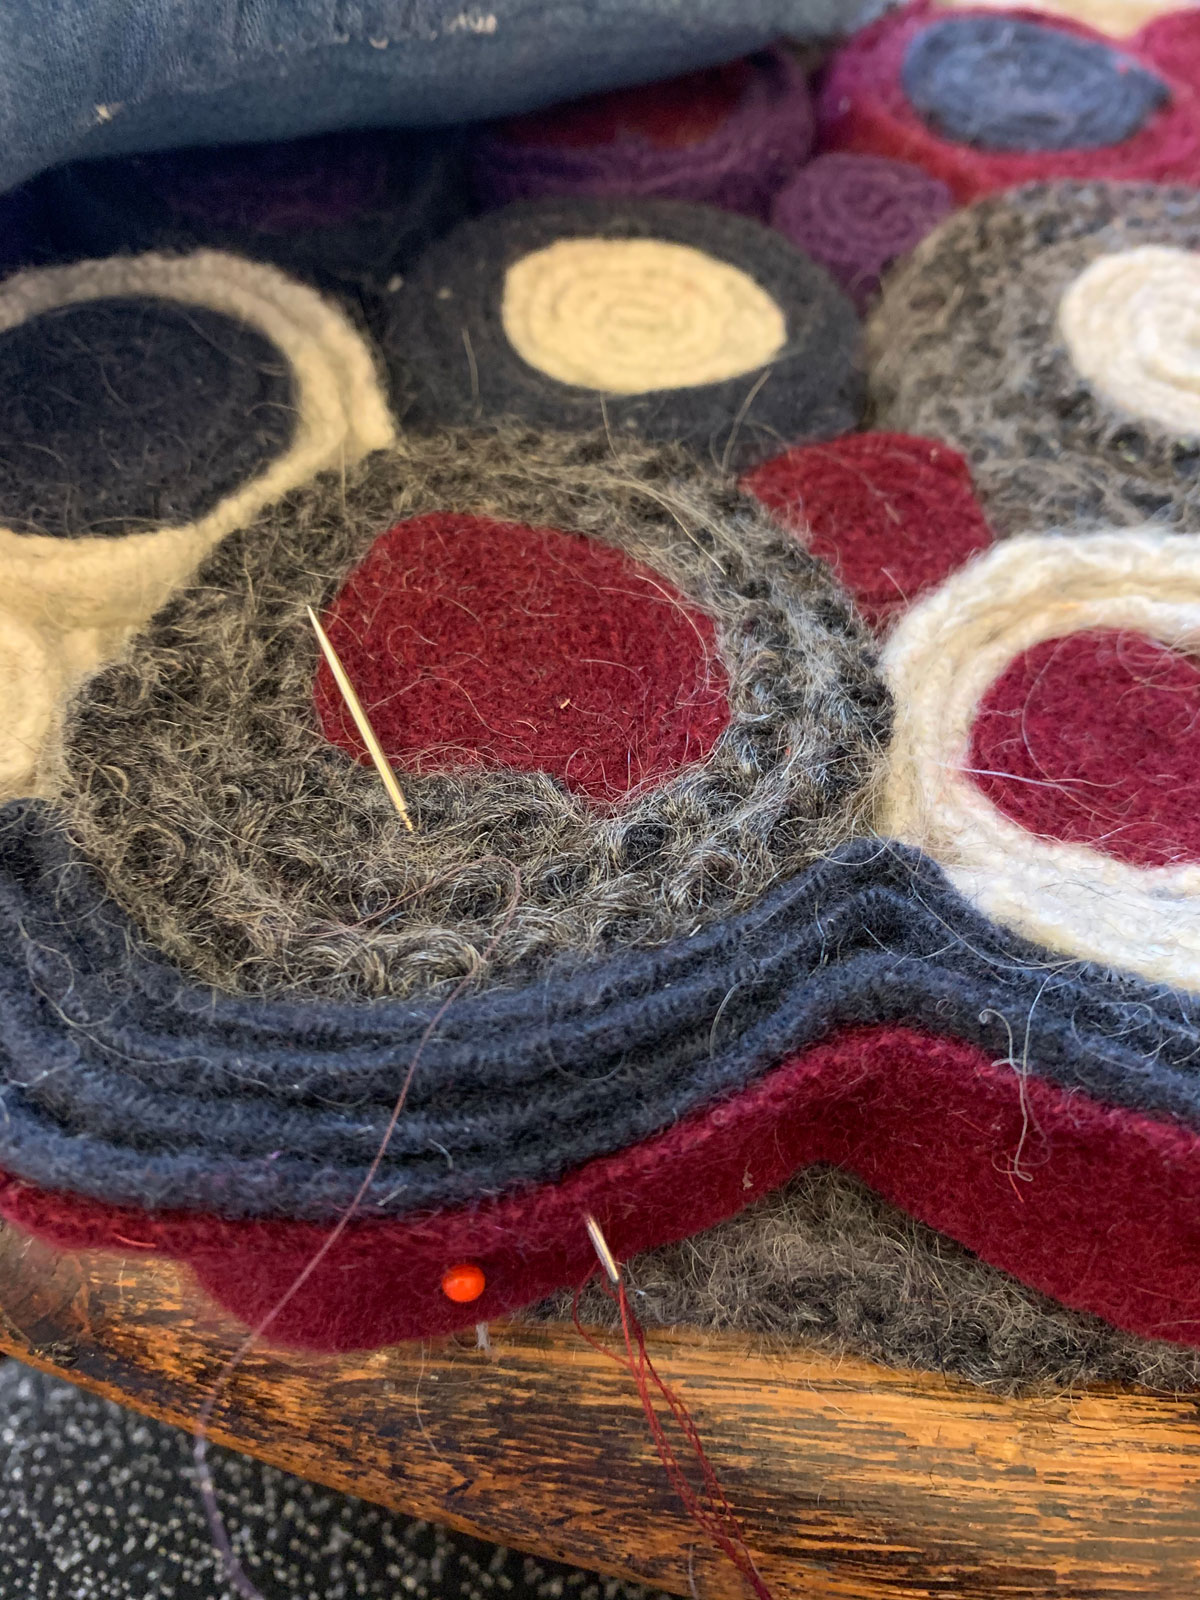
3. Once you think you’ve made enough spirals.
Stitch each one through its layers using a long needle and any sewing thread, as it won’t show on the finished rug.
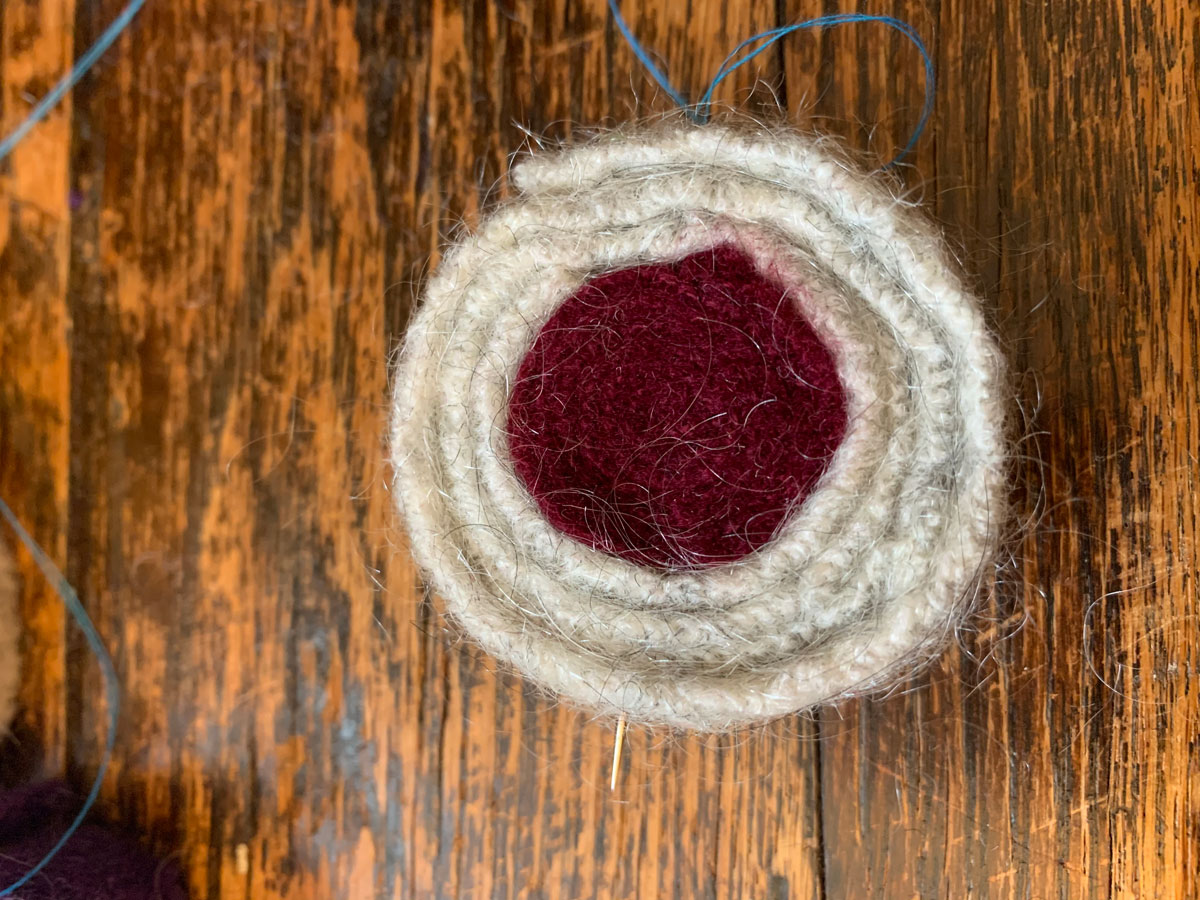
This spiral was about 2” across; I put in stitches at every ¼ way round, straight through the spiral. I did this for all the spirals.
4. Lay your spirals out onto the backing felt
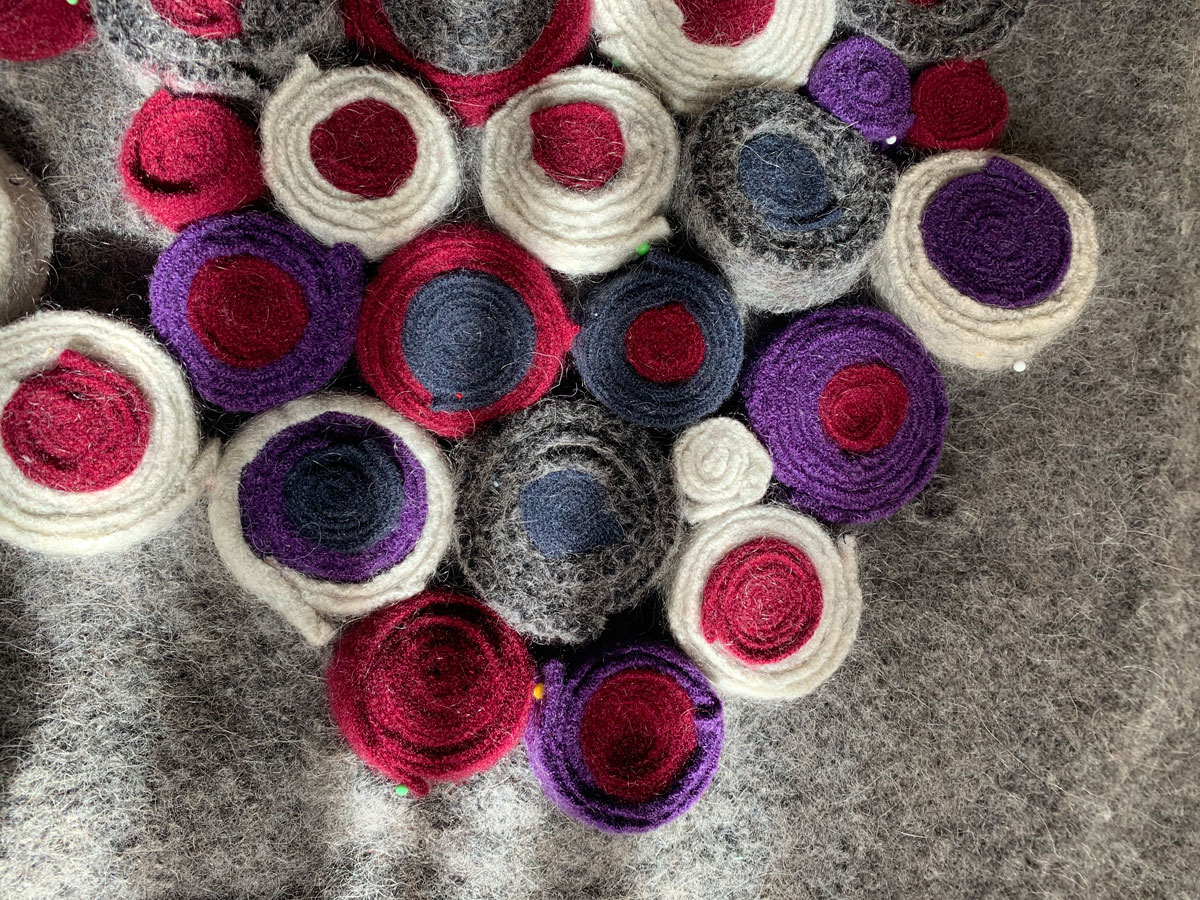
This allows you to see if you’ve made enough, if you have any little gaps, and helps you with the colour balance.
5. Once you’re happy that you have enough…
and that you don’t have any gaps, open your windows as this next step gets smelly!
Spread UHU or Copydex glue (I know, they really smell, I did warn you!) onto the backing felt, in small amounts, but covering the surface. Press your spirals onto the glue, pressing down firmly. Keep going until you’ve used them all up, and then have a break from the smell!
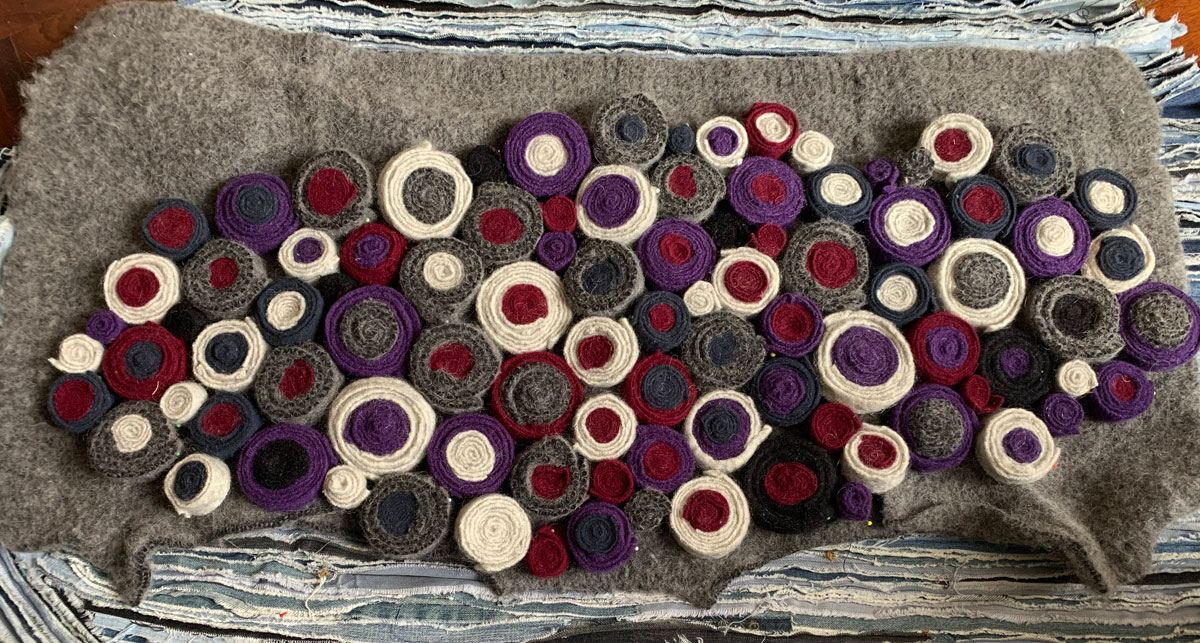
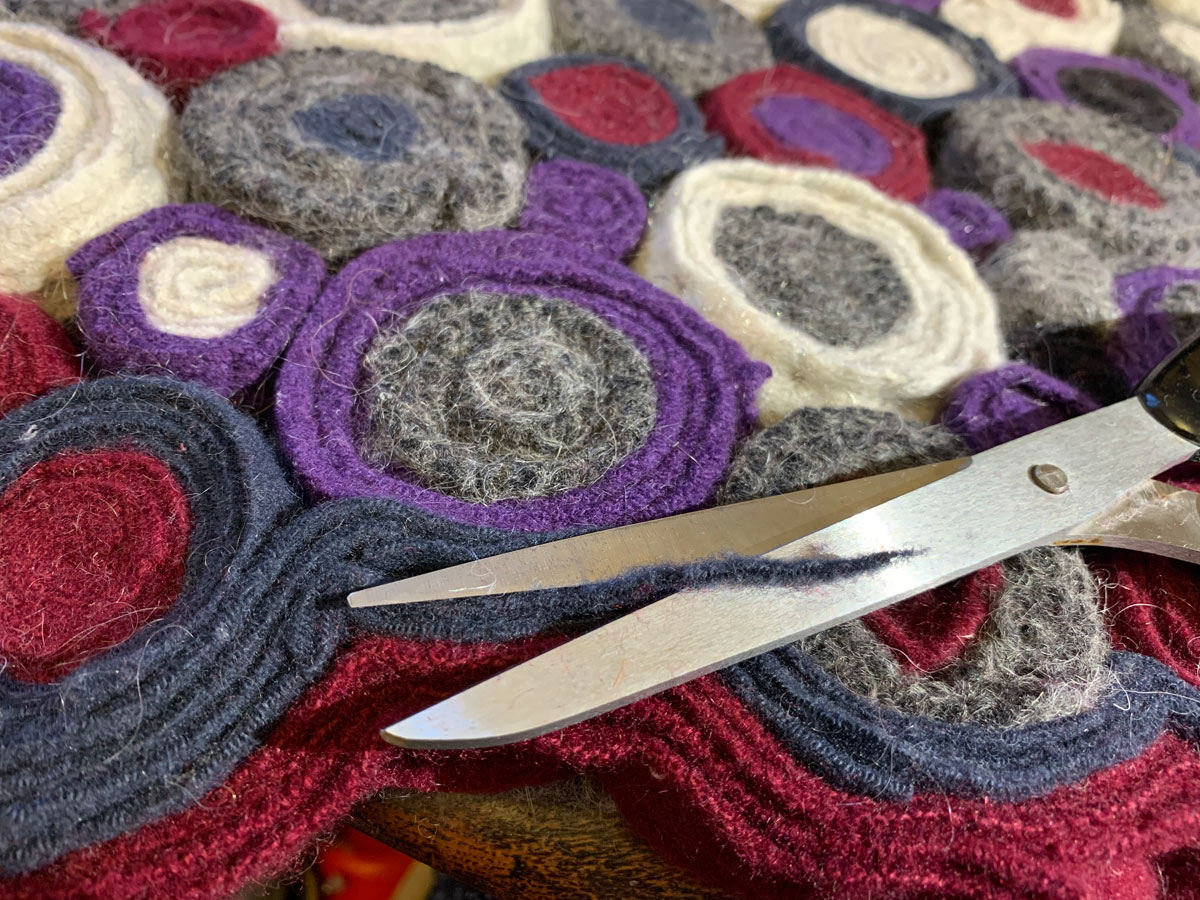
6. Once the smell has dispersed
Trim your backing felt, but don’t trim it too close to the spirals – rookie mistake by me, here, I had to add a couple of bits!
7. Add your border
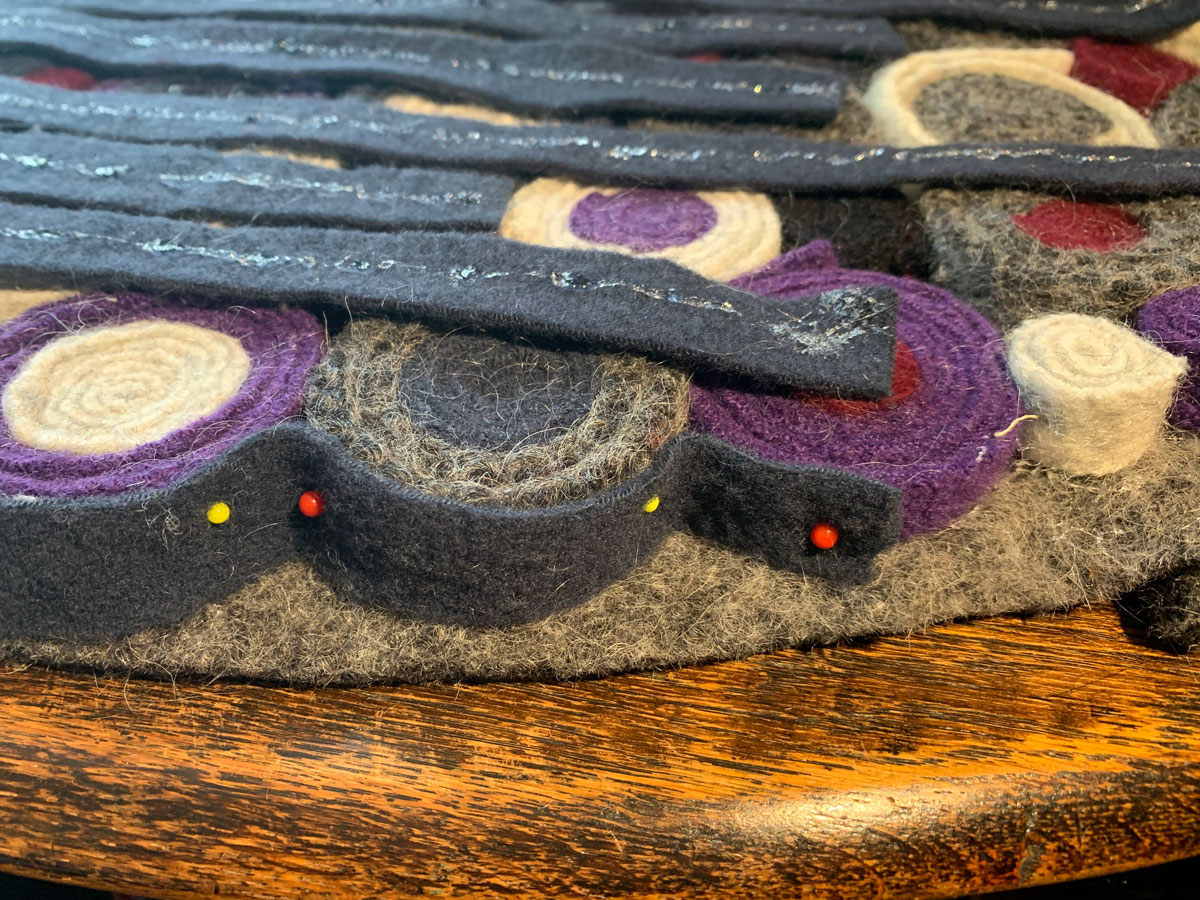
I decided to use the navy and burgundy felted wool to make the border, and tried glueing it at first. This was a mistake, for 2 reasons – first, the smell, and second, they didn’t stick very well.
I pinned and glued each strip in turn, then started the second layer. I think part of the problem was glueing too many strips at once; the glue dried a little.
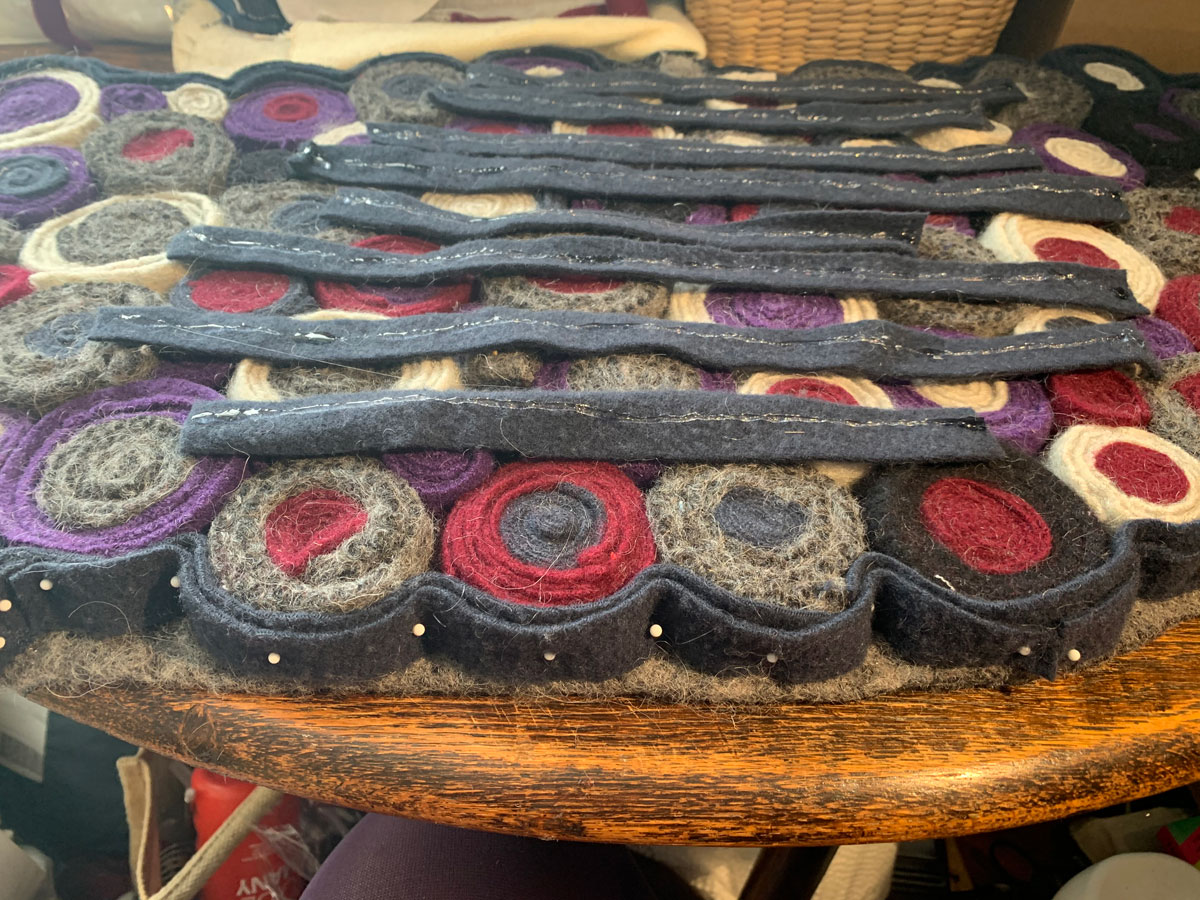
8. Keep adding your border strips until you’re happy with the look
I decided to sew them in place, after I realised they were becoming unstuck, so I used even more pins to hold them in place, and used the same long needle to stitch the border to the spirals.
If you have a thimble, now is the time to use it!
9. Next (if you’re also not accurate at cutting ½” strips of felted wool!), trim the border
This took a while, as I could only cut through one or two strips at a time
10. Finally, the finished rug
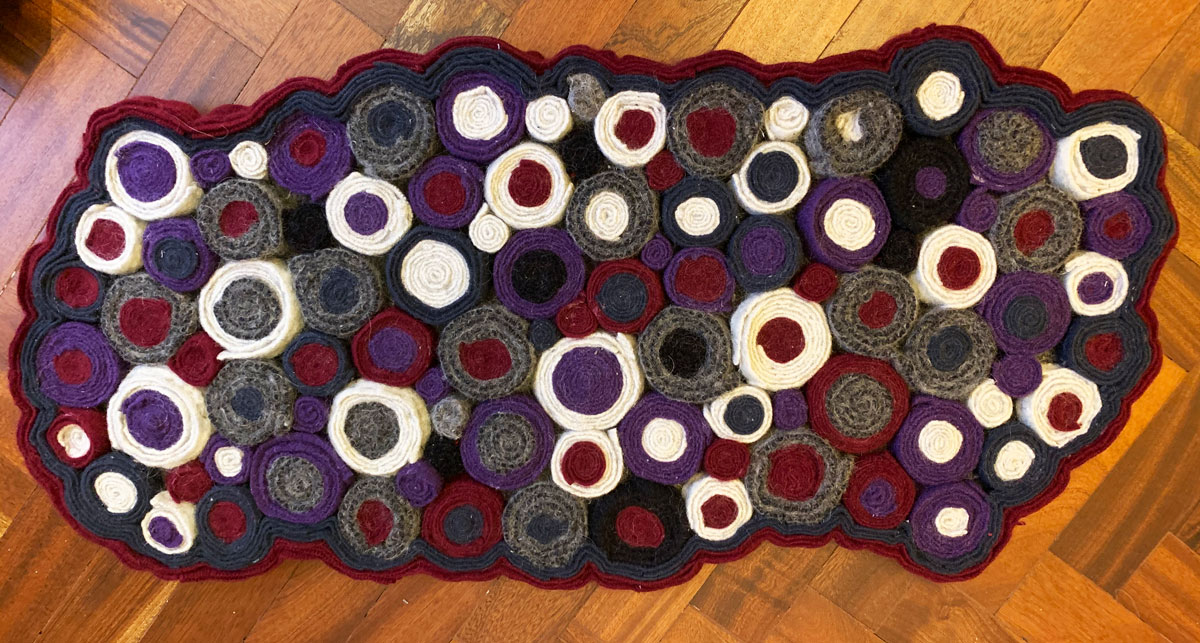
For a first attempt, I’m pretty pleased with the final result, but have learnt along the way, as well. The rug is now by the side of my bed, and feels wonderfully soft when I stand on it.
My OH would like one, so once the shops start opening again, I’ll visit a couple of charity shops, or maybe order some cashmere ones from Oxfam! (and I’ll have that rug, he can have the one made of woollens he shrunk!)
Shirley found less-waste through the original decluttering site less-stuff. She said:
“I found Less-Stuff entirely by chance, and love Lisa’s attitude and values towards life. I’m trying to gently declutter my home, sometimes very successfully, at other times, not so! We are slowly decluttering our camping stuff – my whole family volunteer with Oxfam at music festivals, so we seem to have accumulated many tents over the years! I do successfully declutter my clothes twice a year, as I put winter clothes away, if I’ve not worn something, it goes to Oxfam, the same when I put my summer clothes away. I also decided in January 2019 to stop buying new clothes (apart from Lingerie), and so far, haven’t bought anything new! oh, and i’m also vegan, because it’s better for the planet.”
You can see more of Shirley’s amazing creativity at canvas and paints.