
 Don’t put out the recycling yet! If you have corrugated cardboard, some paper scraps and glue these little boxes are a brilliant way to turn your scrap and recycling into something useful.
They are easy to make and once you know how to make them you can use the same method to make square or rectangular boxes.
What is Découpage and Papier-mâché
Découpage is cutting out and sticking pictures onto a surface. It was a very popular Victorian craft used to decorate trays and boxes. You can still buy special paper for it but you can also use old wrapping paper, magazines or any thin paper.
Papier-mâché is when you use strips of paper or a paper and glue pulp to make objects. The end result is lightweight and strong.
This tutorial uses a mixture of both methods to make handy boxes.
How to make a triangle box out of recycling
The paper pattern to make triangle boxes and lids is here. Or you can draw your own one with a single triangle and 3 sides the length of the triangles sides.
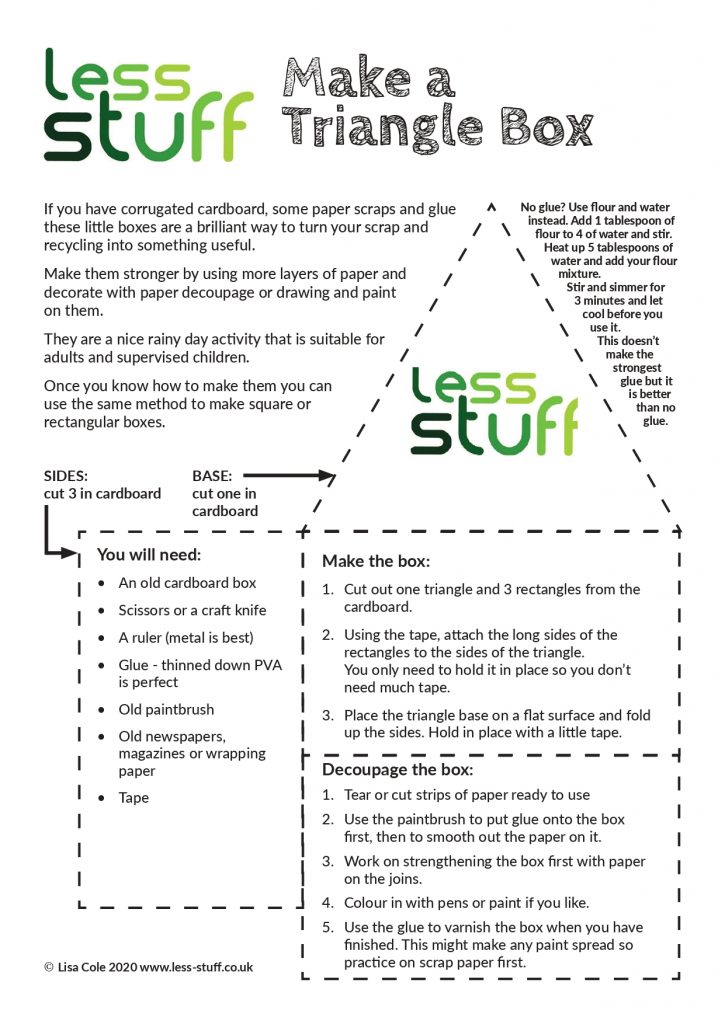
You will need
- An old cardboard box
- Scissors or a craft knife
- A ruler (metal is best)
- Glue – thinned down PVA is perfect
- Old paintbrush
- Old newspapers, magazines or wrapping paper
- Tape
No glue? Use flour and water instead. Add 1 tablespoon of flour to 4 of water and stir. Heat up 5 tablespoons of water and add your flour mixture.
Stir and simmer for 3 minutes and let cool before you use it.
This doesn’t make the strongest glue but it is better than no glue.
Make the box:
Cut out one triangle and 3 rectangles from the cardboard.
Using the tape, attach the long sides of the rectangles to the sides of the triangle.
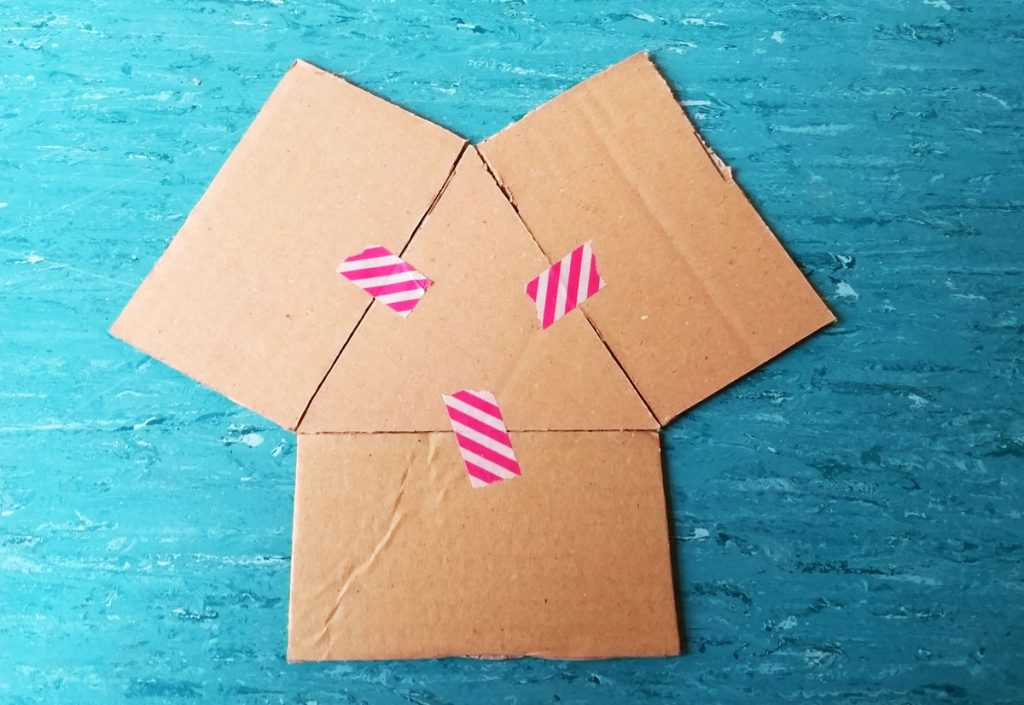
You only need to hold it in place so you don’t need much tape.
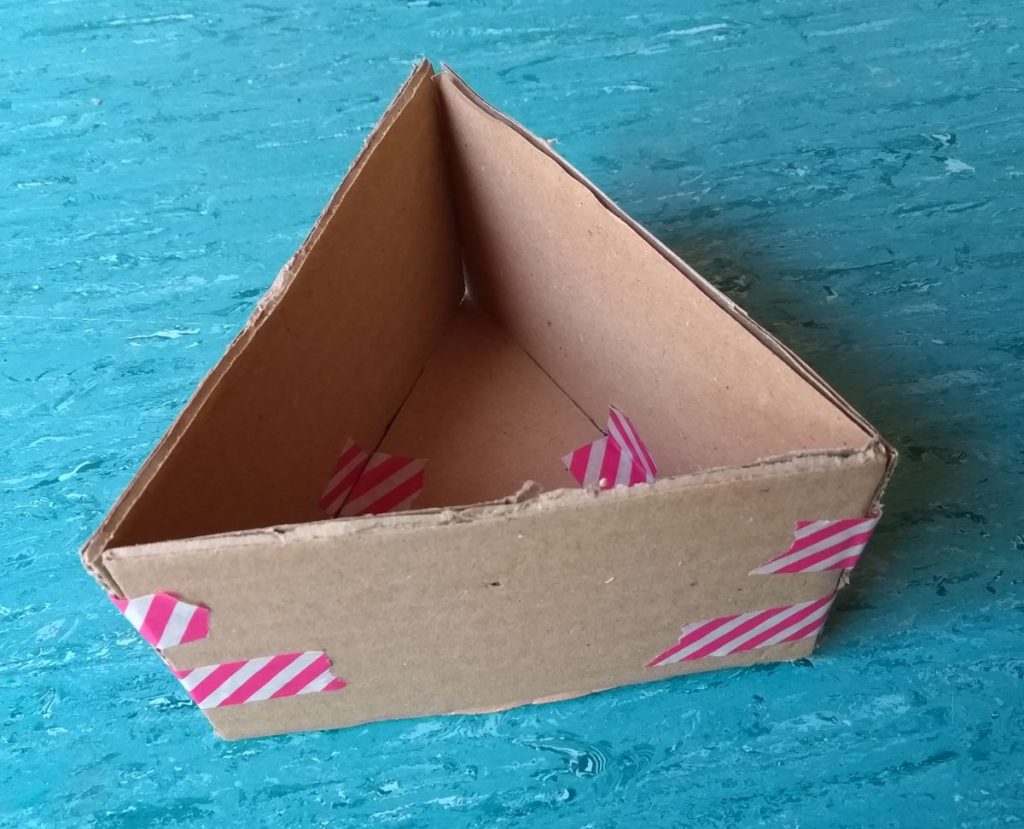
Place the triangle base on a flat surface and fold up the sides. Hold in place with a little more tape.
Strengthen the box:
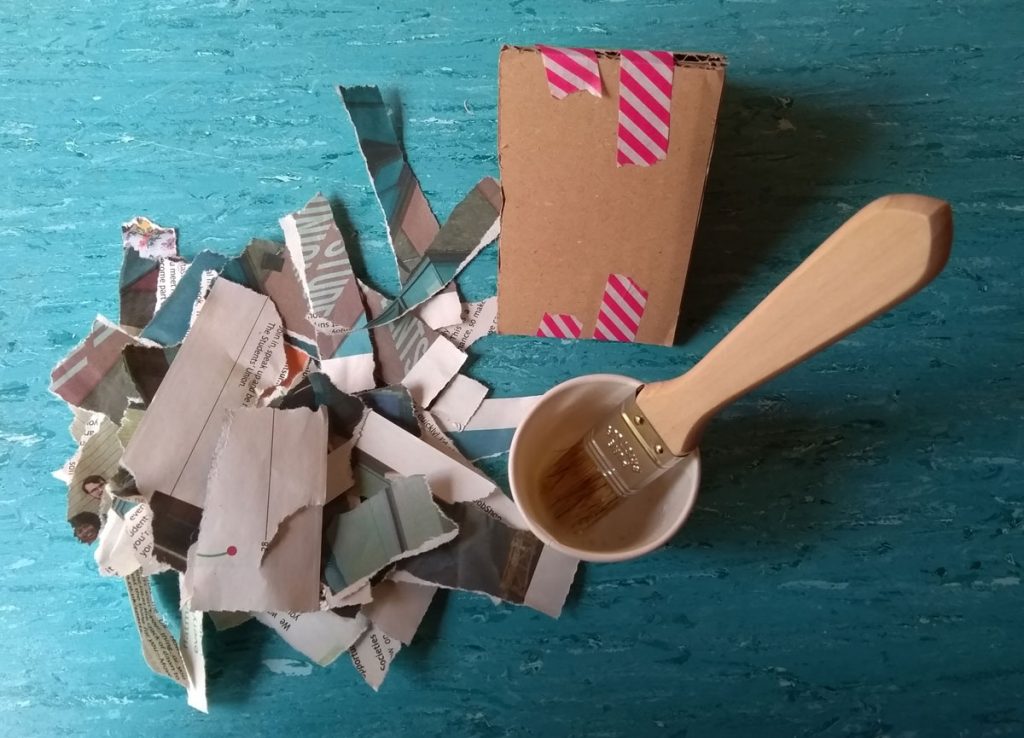 Tear or cut strips of paper ready to use
Add some glue to a little pot and water it down so it is very thin.
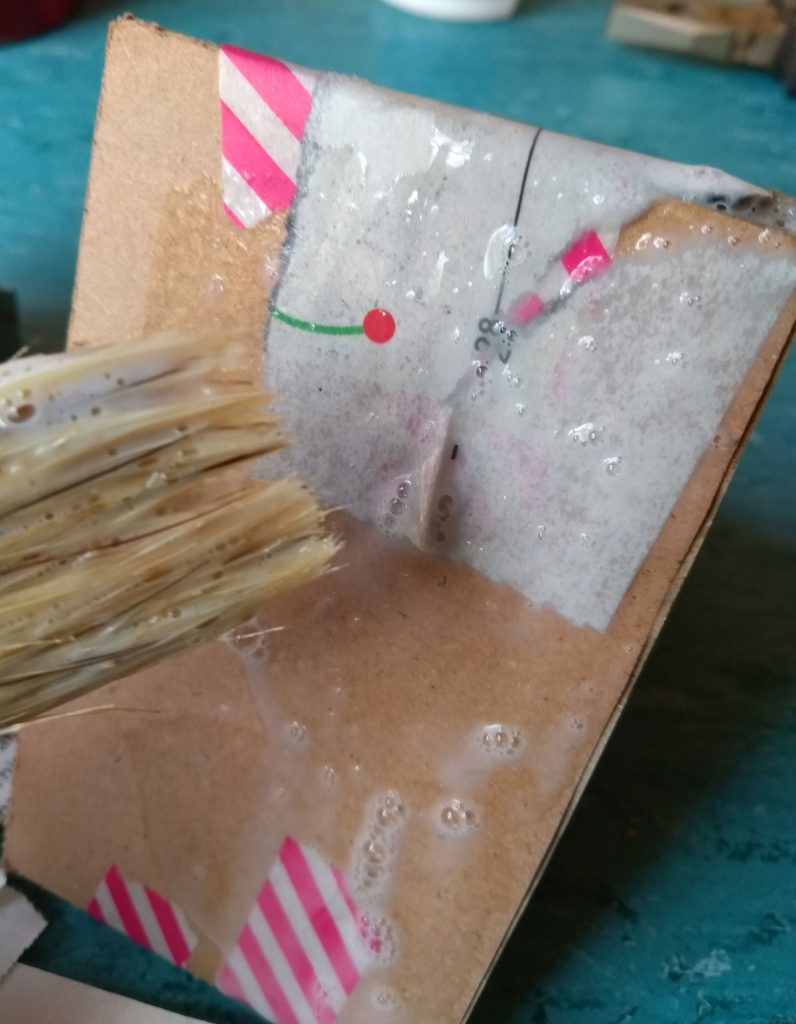
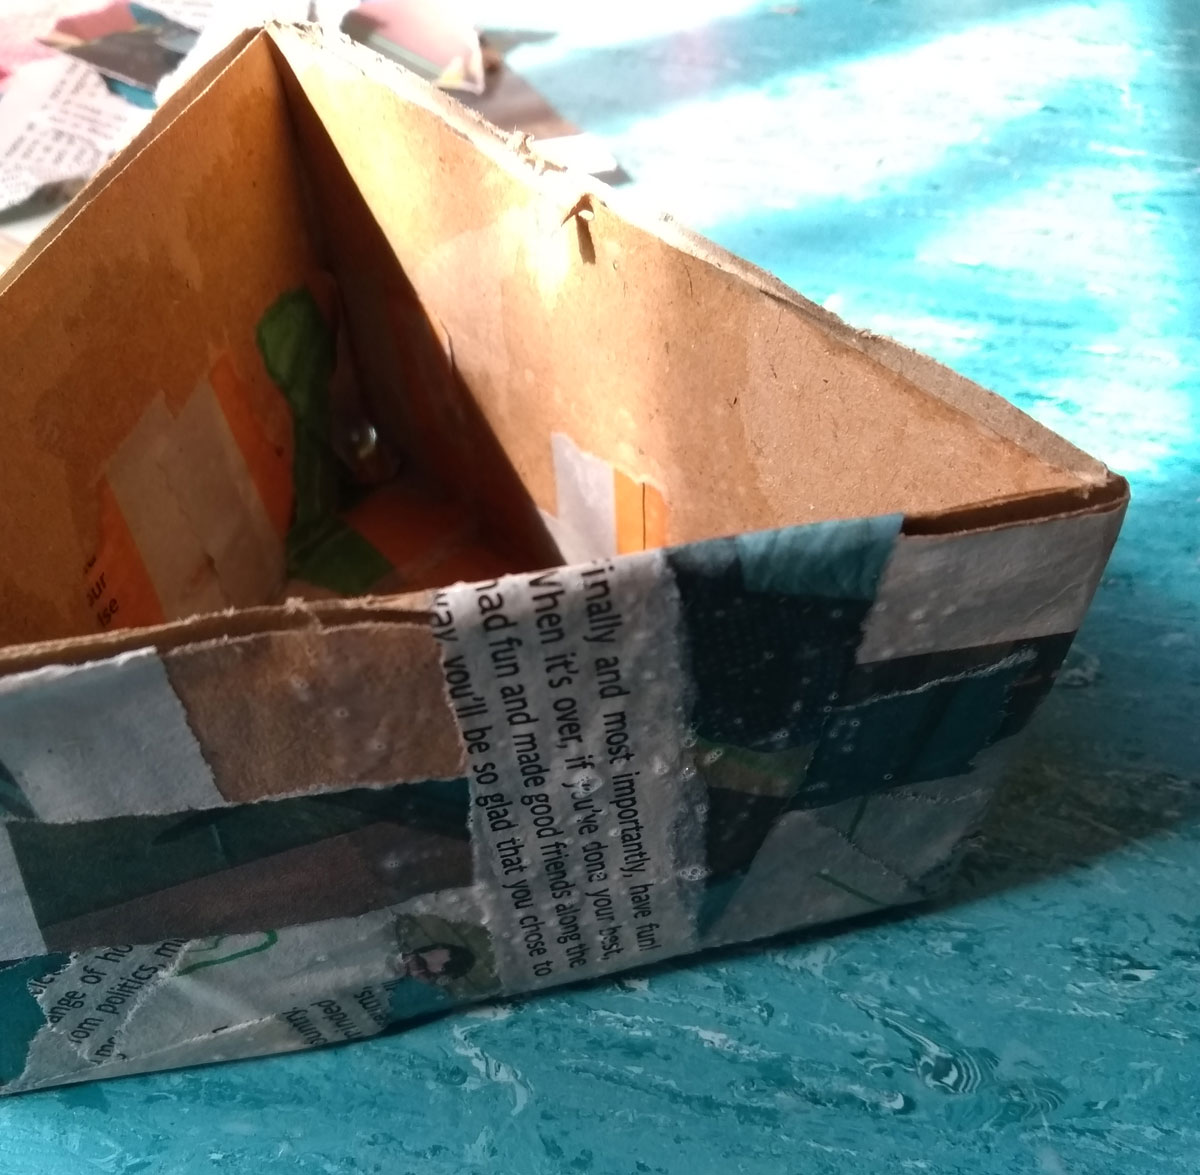
Work on strengthening the box first with paper on the joins.
Use the paintbrush to put glue onto the box first, then to smooth out the paper on it.
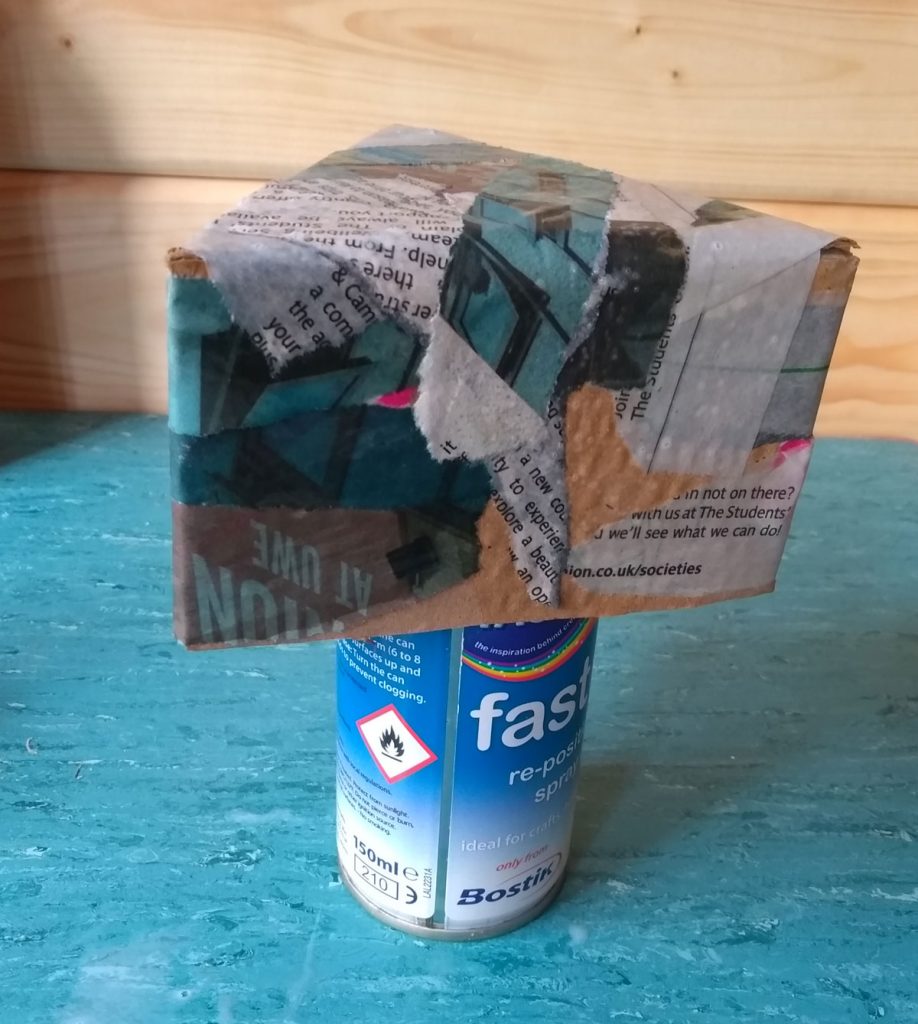
So the box doesn’t stick to the table, raise it from the inside

While you wait for the outside to dry, cover your paintrbrush in plastic. This saves having to wash it
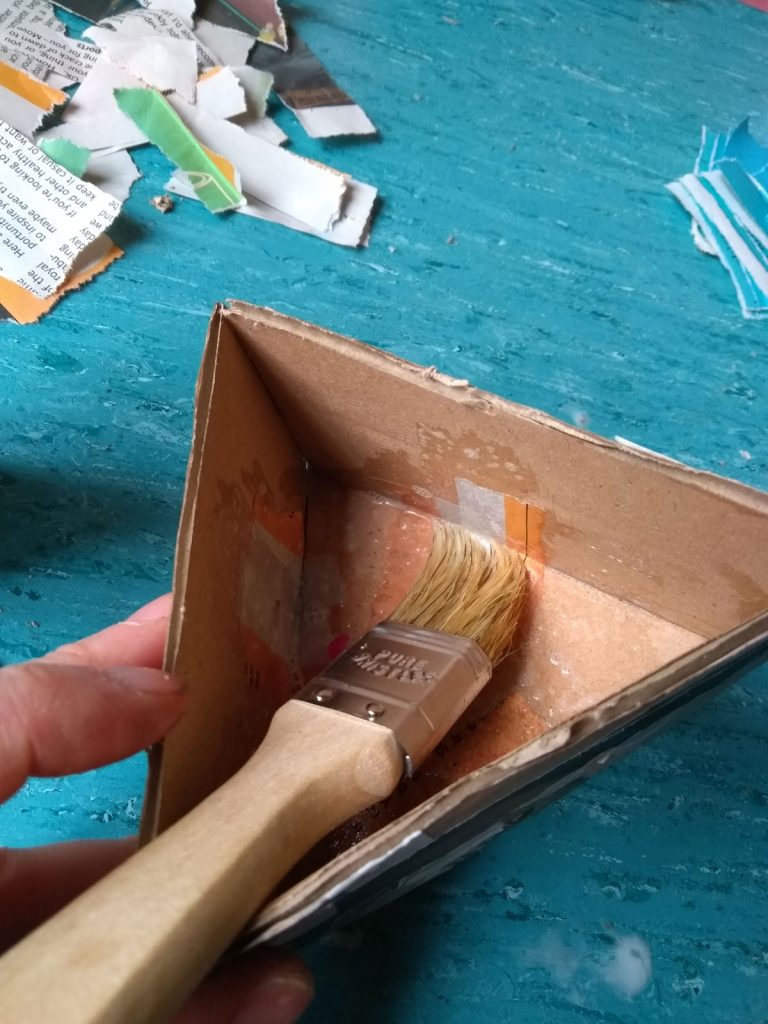
Squish the paper strips in using your paintbrush
Decorate the box
- You can use newspaper to makes stripes with the lines of text.
- Cut or tear out pictures from magazines or wrapping paper and apply in the same way.
- Colour in with pens or paint.
- Use the glue to varnish the box when you have finished. This might make any paint spread so practice on scrap paper first.
Make the lid
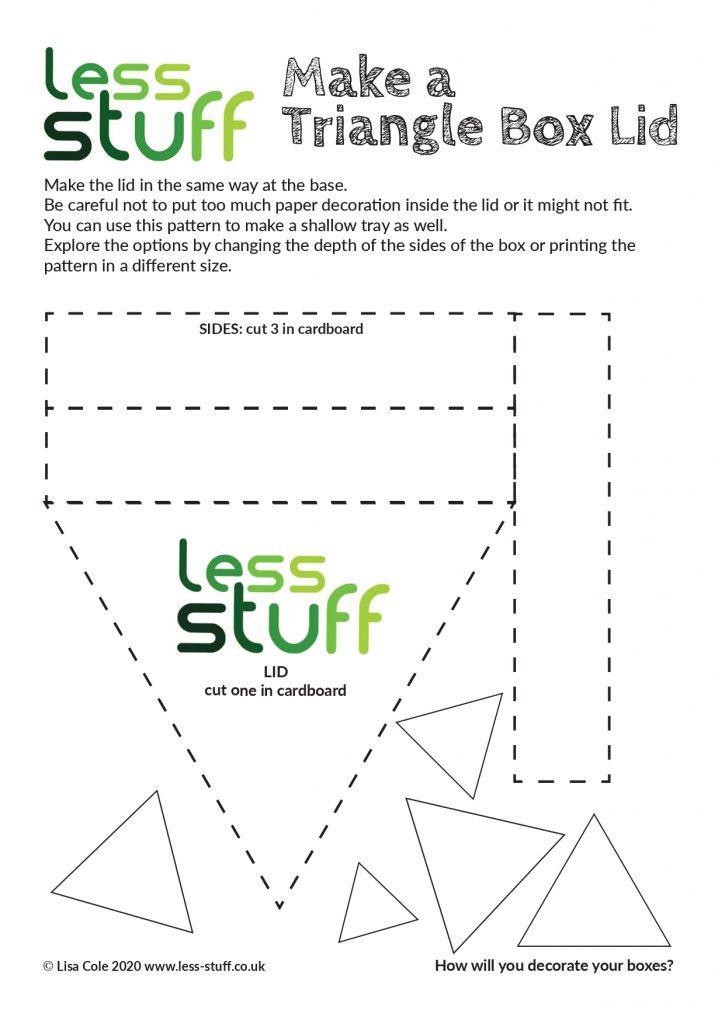
Try printing the pattern out in different sizes too.
Make the lid in the same way at the base.
Be careful not to put too much paper decoration inside the lid or it might not fit.
You can use this pattern to make a shallow tray as well.
Hi. I'm Lisa
Less-waste is where I share the little things I find that help me lead a more ethical life, on a super tight budget.
I also run less-stuff for people who love their belongings and want to declutter gently.
My social media accounts represent both websites.
- You can find me on Instagram if you want to see snapshots of real life on my feed.
- I’m on Twitter and try to join in on chats about organic food, gardening and living ethically.
- The Facebook page is where I share info from others.
- I’m also on Pinterest where I've gathered really good resources to help us enjoy seasonal food. You will find boards about productivity and crafting there too.
- You can find me on YouTube, testing eco-friendly products and attempting to film without being interrupted by a cat.