

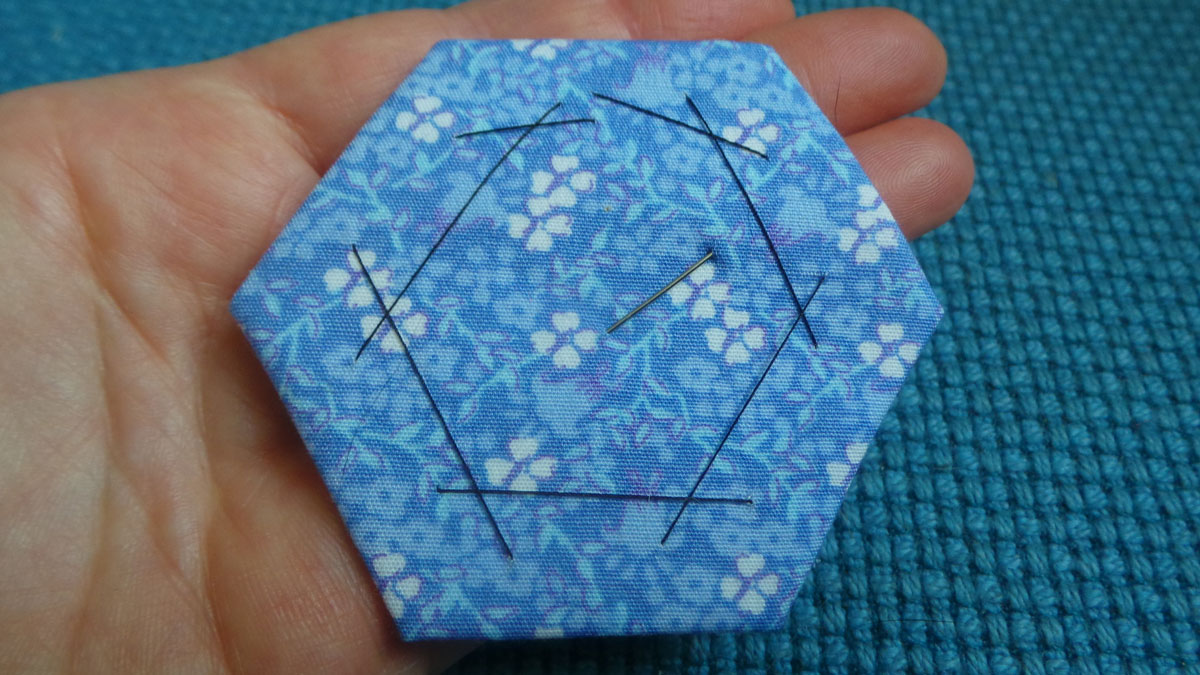
One tacked hexagon
A cautionary tale
The earliest hexagon quilt found was made in England in the 1770’s. The earliest hexagon quilt in my house was made in the 1970s. It was a family project and I have a distinct memory of trying to sew in a small dark and smoky room.
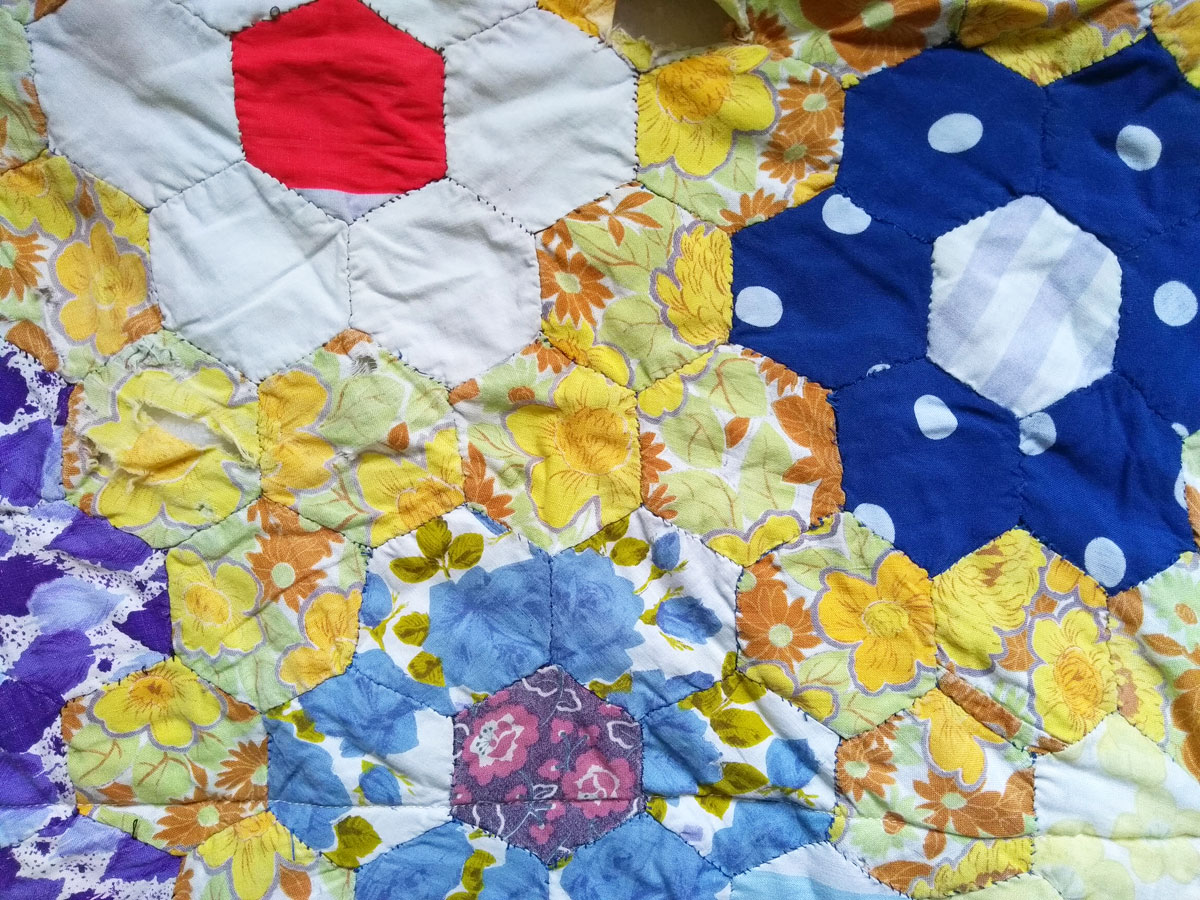
My 1970’s patchwork quilt
We all sewed a bit of the quilt. My grandmother and mother started it off and made sure that any visitor joined in. I can see my childish stitches and I recognise some of the fabrics we used. I have spent 6 months restoring this old quilt and I learned that we should have been more careful in our fabric choices. There are hours and hours of work in there and the weaker material has become so thin it isn’t holding together. Learn from our mistakes and choose your fabric wisely!
The perfect fabric for patchwork
If you are saving old clothes and scraps to turn into a gorgeous quilt make sure your choices are good. In an ideal world you need 100% cotton, shirt or sheet weight, woven fabric in a good condition.
Choose cotton
100% cotton will be easier to work with and nicer to the environment. Any tiny scraps will be compostable if you can’t use them for stuffing. You can tell a high cotton content by trying to make a crisp fold in the fabric with your fingernails. Polyester will spring back, cotton will hold a nice line. If you are feeling dangerous you can try a burn test.
Get a good weight
It is possible to make patchwork from old jeans and it can look great. It will be tough on your fingers though. Traditional patchwork was most often used to save the scraps of valuable printed cotton. The weight of cotton you have in shirts or sheets is just perfect.
Check it is woven

The grain of woven fabric goes at right angles
To keep the patchwork neat you need to control any stretching. Woven material has 2 grains, a warp which is the long thread that runs the length of the fabric and the weft which runs from left to right. You might not be able to tell which is which on a scrap but you can still see clear lines that run at right angles. If you see zig zags and the material stretches then it is probably a knit. T-shirt materials, babygrows etc, are all knitted fabrics and they will not be so easy to patchwork.
Only use the good stuff
A patchwork quilt big enough for a bed cover will take a long time and you want it to last. Don’t be tempted to use every little scrap of material you have. Avoid thin or weak spots unless you want to be meticulously conserving your quilt in a few decades time.
Templates
Hexagons are ideal for patchwork because the angles are nice and wide. When you fold the edges in there is enough room for everything and it’s less fiddly than a square. If you have a compass it is easy to draw out a hexagon or you can download my template (which is part of a longer book called Eco Autumn). 
Workable sizes
A good sized template is at least 2.5 inches or 6cm wide. Smaller hexagons will be trickier and actually take longer to sew.
Keep one good master copy
Make sure you keep one master template cut out of thicker card. You can use that to trace around on old greetings cards to make templates to sew around. Another mistake we made was using any old template to make new ones. The hexagon shape distorted over time and the quilt ended up a funny shape.
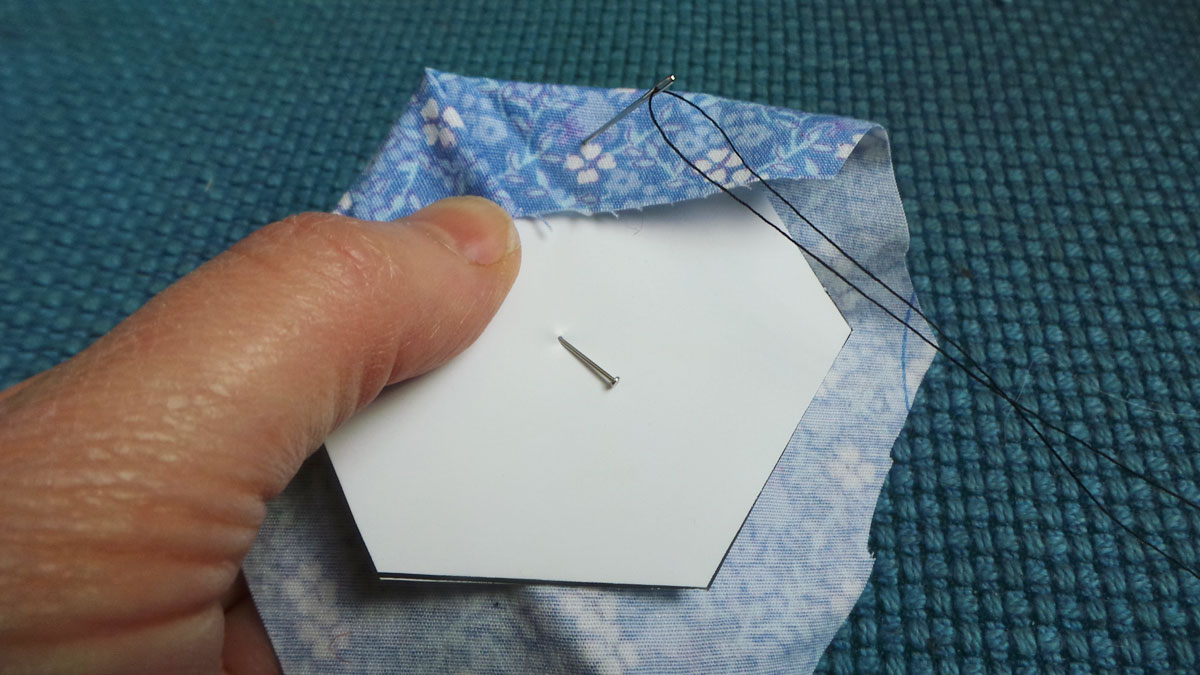
Cut out the fabric
Pin the template to the wrong side of the material. Remember the grain? You need to line up one edge of your hexagon with a grain line. This will help your quilt lie flat when it is finished.
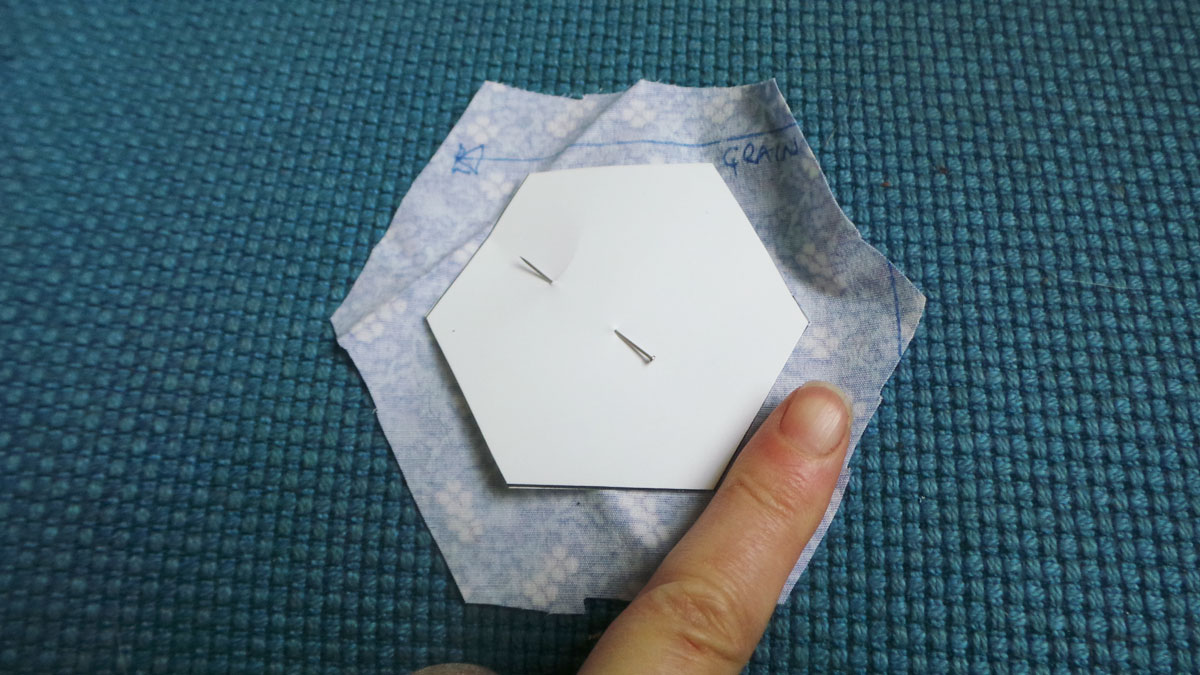
I like to have around 1.5 to 2cm seam allowance which is about the width of my finger.
Start sewing
Use a single thread in a colour that will stand out. All you are doing here is tacking the material around the hexagon to make it the right shape. If you are left handed these instructions work just as well but you might find it easier to fold in the other direction.
Fold the top edge down then the side next to it. Keep those corners neat and sharp.
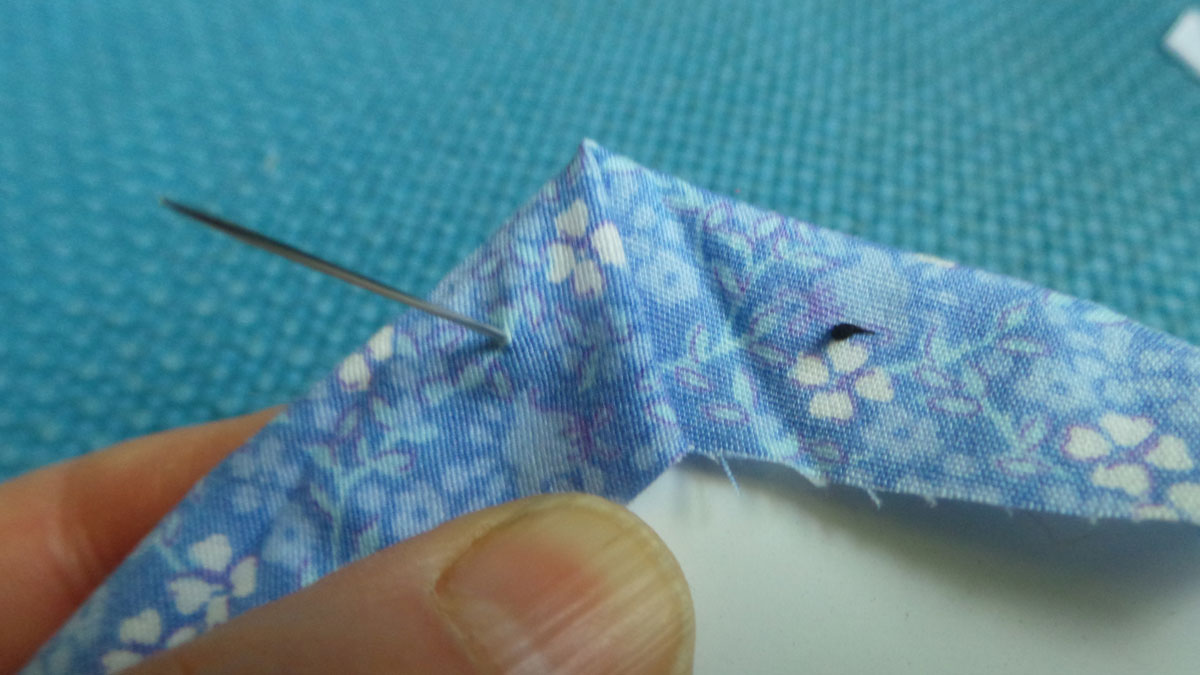
It doesn’t matter which way your needle goes in. Just aim to make a big stitch over the corner to hold it.
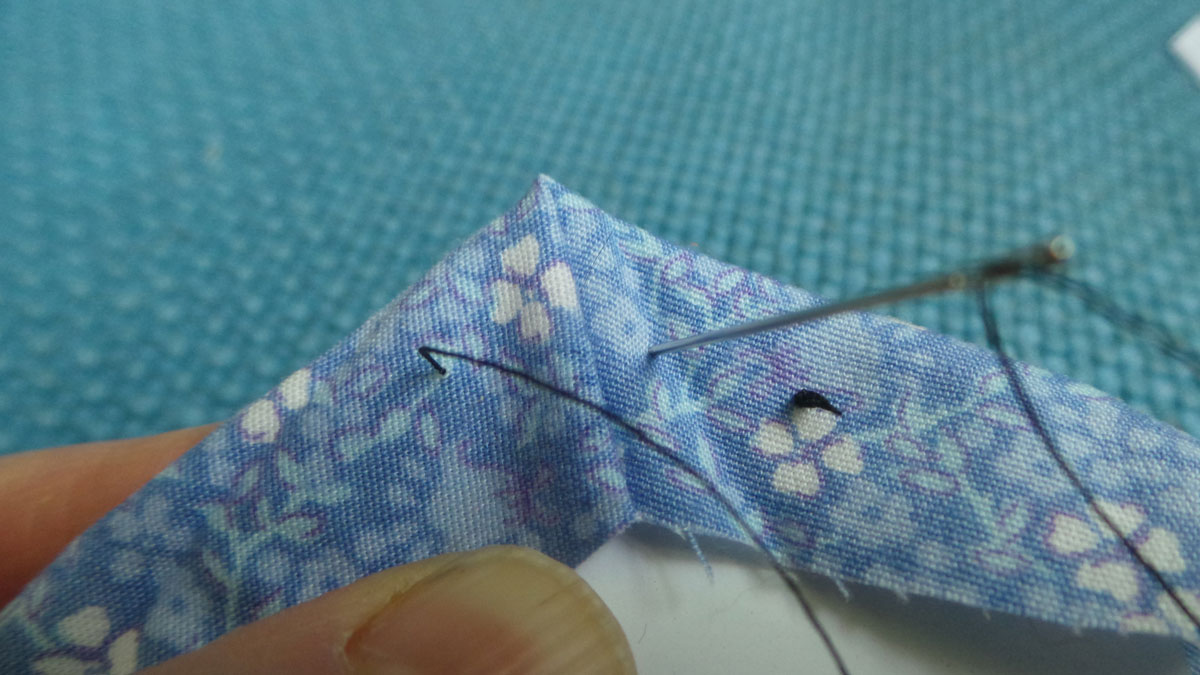
My needle is going down on the other side of the fold now
This is what you want, a nice big clear stitch holding it all in place
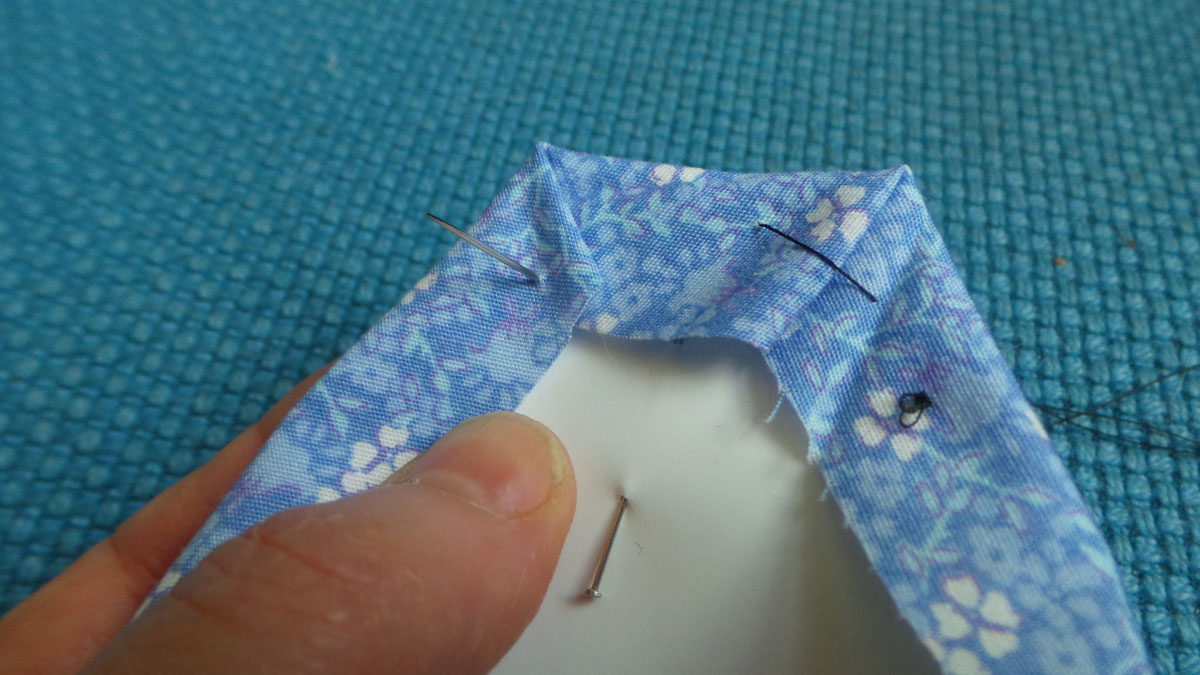
Time for the next corner. I’ve pushed my needle up from the other side
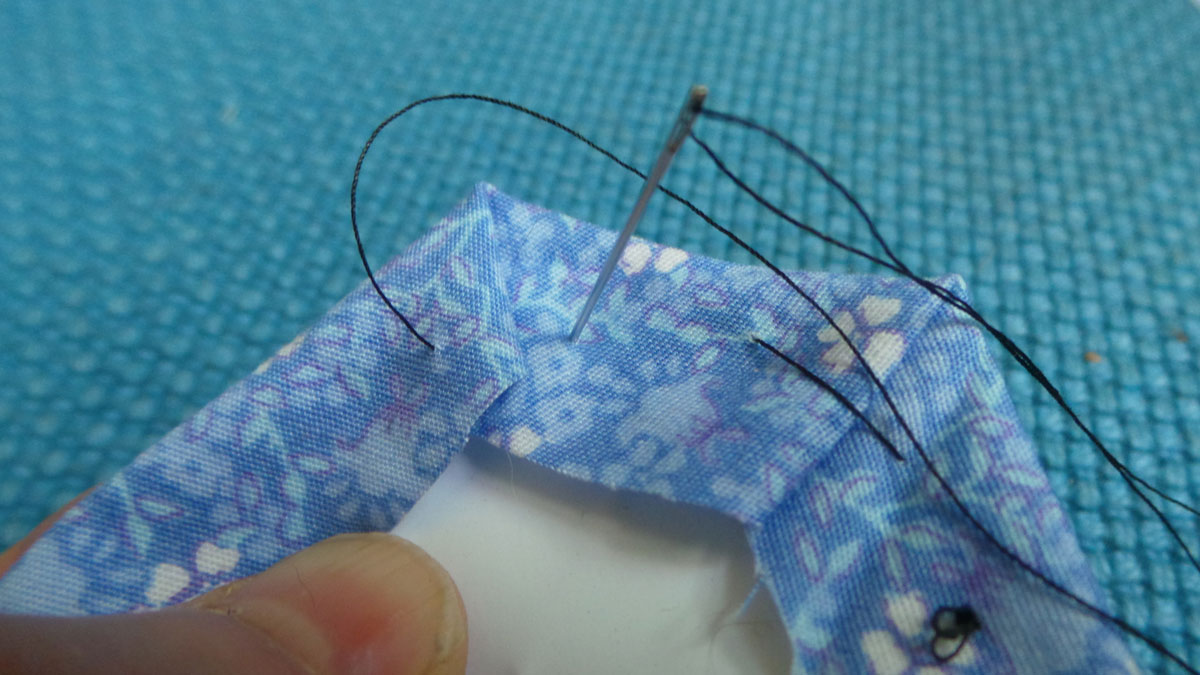
and down again to tack it all in place
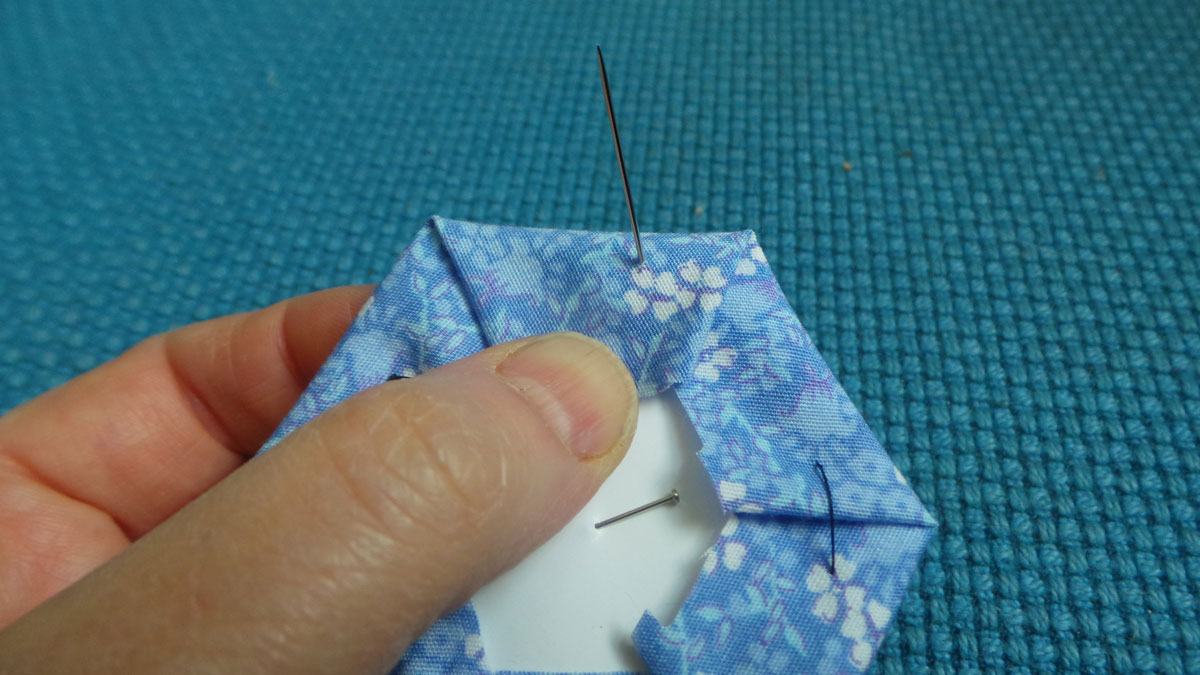
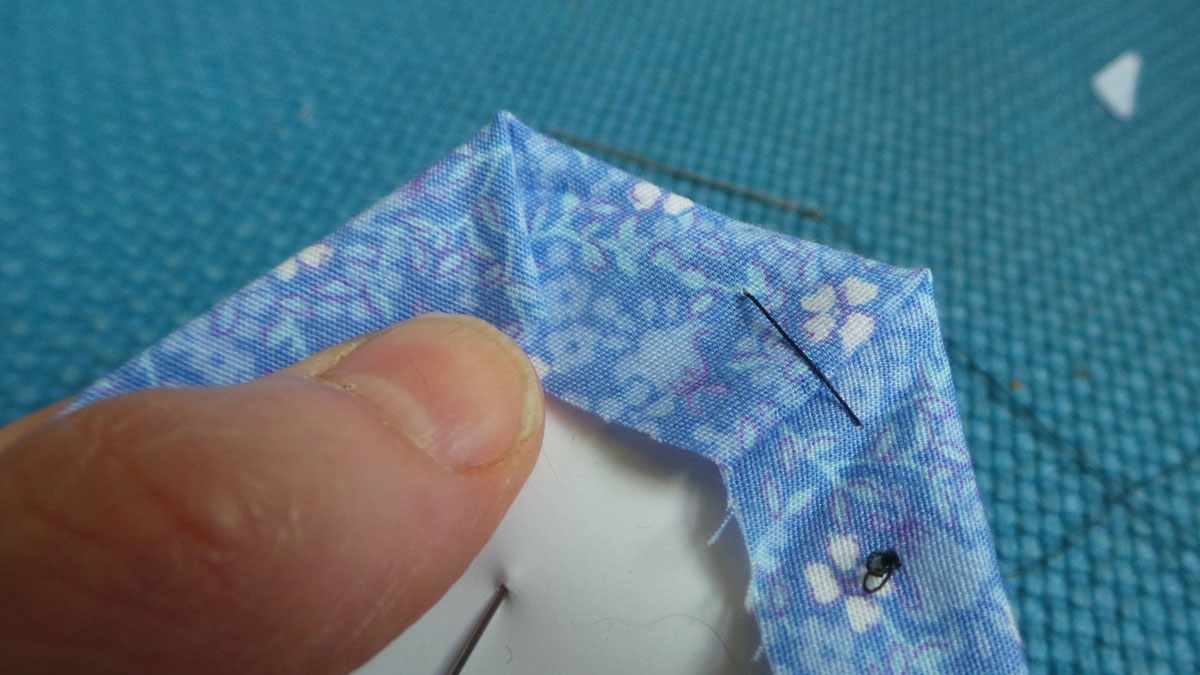
When you get to the end, fold everything over and hold it in place with your thumb while you tack it.
There is no need to tie a knot at the end, just leave an inch of thread so it won’t pull apart easily. You can take the pin out now.
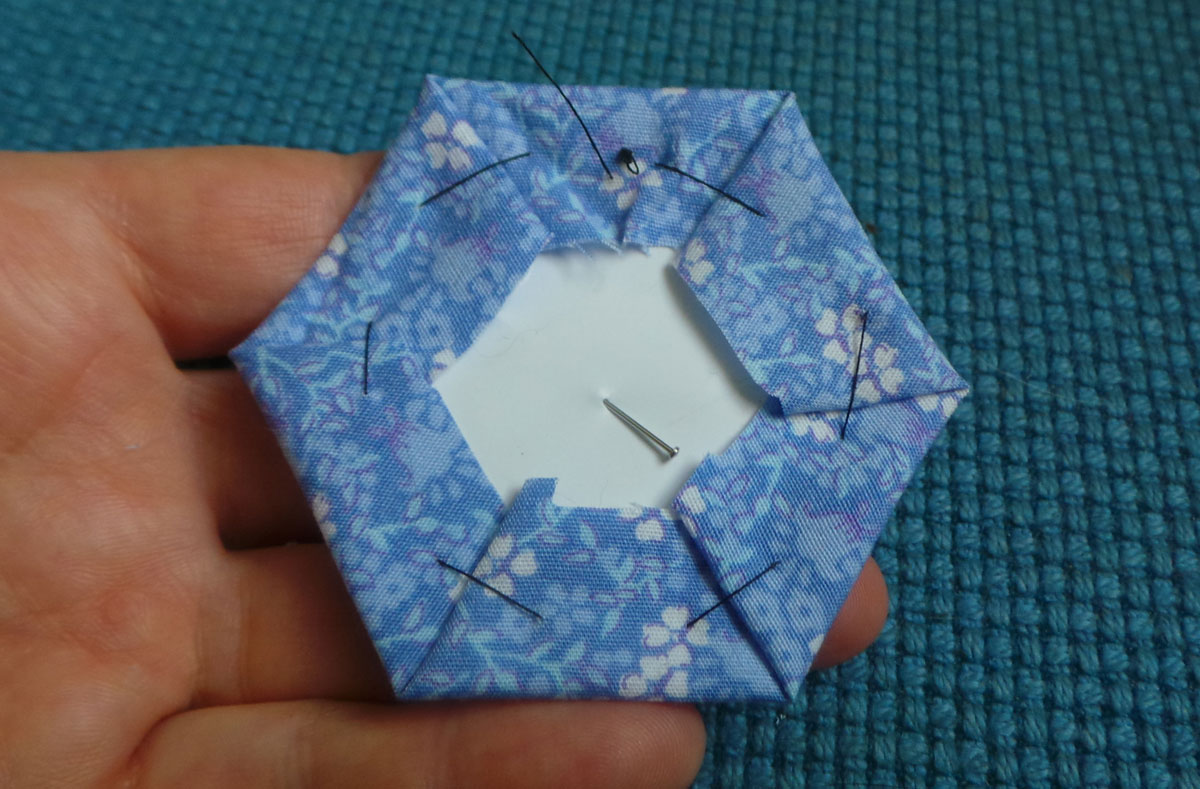
That is part 1 over. Once you have 7 of these you can make a rosette and I’ll cover that in the next post.
Hi. I'm Lisa
Less-waste is where I share the little things I find that help me lead a more ethical life, on a super tight budget.
I also run less-stuff for people who love their belongings and want to declutter gently.
My social media accounts represent both websites.
- You can find me on Instagram if you want to see snapshots of real life on my feed.
- I’m on Twitter and try to join in on chats about organic food, gardening and living ethically.
- The Facebook page is where I share info from others.
- I’m also on Pinterest where I've gathered really good resources to help us enjoy seasonal food. You will find boards about productivity and crafting there too.
- You can find me on YouTube, testing eco-friendly products and attempting to film without being interrupted by a cat.